2023-02-01

Spalted Maple Bedside Table

Greetings friends,

A while back, my next-door neighbor had an ailing Nordic Maple cut down, and I was lucky enough to be able to grab some small pieces of wood as well as a respectably-sized slab from it! It appeared to have some nice spalting, so I thought it would make a fantastic bedside table.

Wet & moldy, but gorgeous!

I brought the slab inside and allowed it to dry for a few months before trying to start processing it. Those of you who read my previous post about my endgrain slab coffee table may remember that slabs of wood dry considerably faster through the endgrain than the long grain, so cookie slabs dry upwards of 10x faster than normal slabs. After 3 months, I used a circle cutting jig with my router to cut the table round. The slab was thicker than I could cut with the router bit I had, so I had to use a jigsaw to cut through the thicker parts afterwards.

With so much more material having been removed, I decided to weigh the slab and track any further weight loss before moving on to the next steps. My plan was to fill the large crack and other negative space with epoxy, and I needed the wood to be really dry before I could pour the epoxy.

About 3 weeks of stable weight was satisfactory for me, so I was ready to move to the next steps. I wanted to make sure I had at least one flat surface to make the epoxy casting process as smooth as possible, so I brought the slab to my buddy Ben at Ply Ply Furniture, who used his CNC table to flatten both sides for me.

I constructed a mold for the slab using terrace board and melamine coated OBD. I used packaging tape to cover the melamine to prevent the epoxy from sticking and caulked the seams of the terrace board to seal it up. I tinted the epoxy using lampblack, which doesn't contain mica (shimmery effect) and gives a great flat black look. The pouring process was relatively simple, though after the initial pour I did have to nurse a few small leaks over the course of a few hours as the epoxy cured.


After a week I unmolded the slab and was really pleased with how it turned out, despite the mess and headache with the casting process. I saw it as a great learning experience in any case. Some sources say this slow-cure epoxy needs several weeks to reach peak hardness, so I let it sit around for a few more weeks before taking it back to Ben for one final flattening. 


At this point the table just needed sanding to smooth out both faces and the sides, and the legs to be attached. A few hours with an orbital sander did the job, and my usual urethane oil varnish really made the grain look great. I had a few hairpin-style table legs left over from another project, so I decided they'd be great to use for this. I drilled holes for M10-1.5 threaded inserts, which I figured would allow me to easily swap out the hairpin legs for something else later on if I decide I wanted to.

I'm incredibly happy with how this turned out! I'm including several photos to show off the finish as well as the grain of the wood. I found that some very small bubbles are still present on the surface of the epoxy, but since this will be a practical piece of furniture, I'm content to leave them as they are. Removing all the bubbles would have been a tremendous effort that I think ultimately wouldn't have been worth it.


Thanks for reading,

Juju

2023-01-01

Quick and Dirty Boat Building Competition 2009

 Greetings friends,

This post is a blast-to-the-past for an event I participated in during my junior and senior years of high school. The Quick and Dirty Boat Building Competition (QDBBC) was a staple of the Seattle Maritime Festival in the late 2000s/early 2010s though unfortunately it appears as though this event no longer takes place during the festival, with the last promotional materials available online from 2012.

In the last years of high school, I was a member of our school's Materials Science Club. We decided in 2009 to enter that year's QDBBC as a 3-person team. The basic idea of the competition was to build a seaworthy boat within 6 hours on a materials budget of $100 and subsequently race the boat against the other competitors. All teams were allowed an additional $100 to test-build their boat before the competition to make sure the designs were feasible.

We decided early in the process to draw inspiration from racing shells, specifically their long and narrow design targeted at higher top speed over maneuverability. With the three of us seated along the length of the boat, we'd each be able to use 2 "oars" to propel ourselves. Here is a CAD model I created at the time as a draft of the general design:

After digging through some old photos, I surprisingly found a scanned image of the receipts from when we purchased our materials. For those of you reading this in 2023, it may seem impossible to buy all these materials for under $100, but things were way different in 2009! The plywood sheet was made into the body of the boat, the PVC pipe was crafted into pontoons and oars, and the 2x4s were primarily used for structural support.

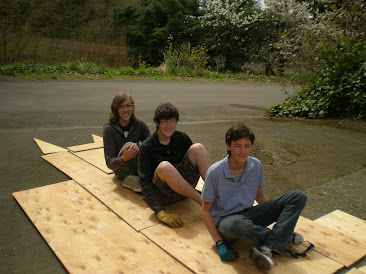
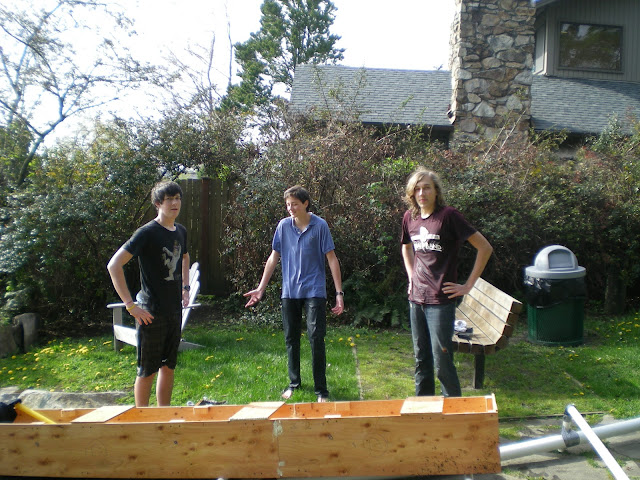
We constructed our test boat at one of our team member's houses because of the proximity to Lake Washington, where we planned to make our maiden voyage. Surprisingly, we documented the construction quite thoroughly with tons of photos and some videos from that day, from which I'll share a selection below. I'll post them chronologically, in an effort to make the assembly process easier to visualize. Click on any of the photos to see a full-size version!


The changes we made between the first CAD prototype and this test run are pretty subtle, with the biggest change being from a blunt bow to a pointed one. The cheap lumber we used necessitated a lot of expanding foam to fill the gaps, but we were still well under budget. At the end of construction, we were very eager to get into the water! Luckily it was a reasonably warm spring day, because things didn't quite go as planned (see video below)...


After a dip in the lake, we realized that our pontoons were not as structurally sound as we had hoped. As is hopefully visible in the photo above of the pontoons, the PVC pipe was screwed onto the hull from the top, meaning that only 6 drywall screws were carrying our combined weight when in the water. We learned our lesson, and later revised our design to prevent this failure from happening again.


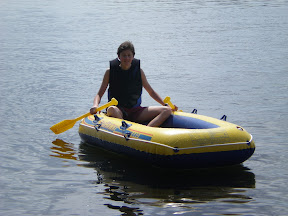
The following week, we modified the pontoon cross-beams to pass through the hull rather than sit on top, and kept our small pieces of 2x4 as supports. We decided to grab a quick lunch before making a second attempt in the water. This time around, we were equipped with life preservers and only had two of us out on the boat. Additionally, one of our team members took an inflatable boat alongside us in case of emergency. It goes without saying that this test was far more successful than the first!


We felt confident at this point that we were ready for the competition. When the big day finally came, the construction process went incredibly smoothly, thanks in no small part to the experience gained from the trial run. The competition was held at the Bell Harbor Marina on the Seattle waterfront, and the weather was as good as we could've hoped. One of fellow Materials Science Club members designed a team flag for us, which we proudly displayed during the assembly as well as during the race!


After a busy 6 hours, we were ready to take to the water. A trailer was available to haul our boat down to the docks, and with only a bit of struggle, we managed to get her floating. The race consisted of 3 heats with 3 boats each, the winners of each heat moving on to the final heat. We won our first heat, and placed third in the final. One of our team members compiled the footage of the race into a short video:


During the award ceremony following the race, we were also given the award for "Best Student Team", though at the time we were under the impression that we were the only student team participating! We took it as a win, and were happy with the results. This was one of the most memorable experiences of my high school years, and I'm very happy to be able to share it here! I hope you all enjoyed reading about it as much as I enjoyed writing it.


Thanks for reading,

Juju